Archive | Tutorial RSS feed for this section

Envelope Tutorial…..

2 Jul

Good Afternoon crafty friends… I have received several messages asking me to do a tutorial for the punched edge envelopes so here it is!

This envelope measures 5″ x 6″

These instructions are for the Martha Stewart Scoring Board.

Start with an 8 1/2″ x 8 1/2″ piece of card stock.  With your triangle corner tool in place score at 3 5/8″ and then turn your page 90 degreesThen score at 3″ and again turn your page 90 degrees…

Score at 3 5/8″ again and turn 90 degrees…

Then score again at 3″….

Now cut out the little pieces where your score lines go over each other  (I know I am not explaining this well) here’s a picture to show you….

Now round off the bottom widest flap using your corner rounder…

Now use some strong adhesive Sookwang tape works the best I find.  Oh and PLEASE note where I put the tape…. Like a dunce I taped the actual flap twice and ended up gluing my envelop shut TWICE!  *roll eyes*  here’s a pic…

Still with me?  LOL!!!

Now using a Martha Stewart Punch Around the Page punch set start with the corner and punch the envelope flap… once you have punched the corner line up your punches and punch down both sides of the flap….

Almost done!!!  Now cut a 4″ x 4″ piece of matching design paper to decorate your envelope and adhere it to the inside flap of your envelope…

And there you have it!!!…..

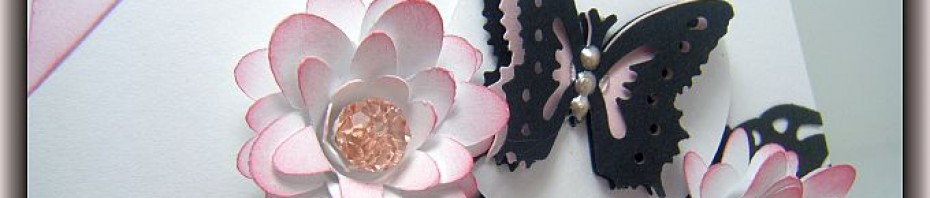
How slick is that huh? 😉  Here’s a peek at the card and envelope together…

Well, I hope you have found this useful and if you make one, let me know how you made out!

Thanks for stopping by!

EK Dimensional Punch Flowers Tutorial…

27 Aug

Hi Everyone,  I have been asked by several people how I make the flowers I decorate my cards with using the EK Dimensional Punches so I thought I would do a bit of a tutorial so people can see how easy they are to make.  Here`s a picture of the three punches I will be working with…

There are other punches but these are the three that I own, Dahlia, Doily Petals and Carnation.  The first one I will show you is the Dahlia as it seems to be the most popular.   Here`s a closer look at the Dahlia punch:

To start with you will need 2 pieces of paper, each 11 or 12 inches long, these punches are a great way to use up any scraps you have lying around. So here is a pic of the two pieces of paper that I will be using for the first flower…

I decided to use a plain piece fof paper and a patterned piece this time.  You will use this punch just like any other border punch by following the guide and matching up the petals to it…

  Then you will do the other piece of paper…

Once you have both pieces of paper punched you are ready to assemble you flower.  For this you will need some glue, I use Aleene`s Tacky Glue but any all purpose glue will work.  I like to water my glue down and fill up this smaller bottle as it has a very fine tip and lets you apply your glue in fine little lines, it`s so much easier to control how much you use and it avoids using too much glue and that always makes a mess.  So here`s my paper all ready to go…

  And here is a pic of the glue I use: 

I draw a line of glue along the edge of one piece of paper and then place the other on top of the first piece of paper off set by half a petal.

 See the fine point comes in handy when applying the glue 🙂

 Now we make our flower using a quilling tool.  You could also use a pencil, but I find the quilling tool so much easier to use and it rolls the flower nice and tight.

 You will need to note if you use two different types of paper like I did, you will need to roll the patterned paper on the inside because when you unfold your flower, the pattern will show.  Keep rolling the flower up, I use a dot of hot glue periodically to keep it all secure.

Continue to roll right to the end and add a dot of hot glue to the end to complete it.

 So now we have the completed flower all rolled up and ready to go…  

Now all we have to do is unfold the flower!  Peel each petal back all around the flower.

Usually when I get to the center the end petals are only half petals so I snip them off.

 And there you have it!  Add a lovely bead to the center and you are finished!

 I hope this was easy enough to follow.  If not, just let me know and I will make adjustments.

Hope this was helpful!

Thanks,

Lisa 🙂